HIKING
How To Break In Hiking Boots
Planning to hit the trails in a new pair of boots? Here’s how to prep your footwear for your wilderness adventures
BY RACHEL CAVANAUGH
It’s easier to enjoy the beautiful scenery of a nature hike when your feet are comfortable—that’s why it's so helpful to know how to break in hiking boots. Most hiking shoes need some time to get acclimated to life outdoors. Otherwise, they have a tendency to rub and chafe. To help you get started, we’ve put together an easy guide to help you get your hiking footwear trail-ready.
For more information on how to keep your hiking boots in tip-top shape check out our guide on how to get rid of hiking boot odor.
How Long Does It Take To Break In Hiking Boots?
It can take anywhere from one to four weeks to break in hiking boots, depending on the type of boots you have and how strenuous your hiking will be. Some of the newer lightweight hiking shoes require little to no breaking in at all. Traditional leather boots, on the other hand, often take a bit longer. Generally speaking, if you’re sticking to simple day hikes, you’ll need a week or two to get your footwear in shape. In contrast, if you’re gearing up for a major trip (i.e., touring national parks, trekking into the Grand Canyon, etc.), plan to give yourself more time.
How To Break In Hiking Boots: Three Easy Steps
If you’re eager to hit the trails, but you’re not sure how to get your boots ready, follow this simple three-step plan.
Step 1: In your home
Before you venture outside, start around the house. Wear your hiking boots while you’re making dinner or doing laundry. Lace them up snugly and make sure the tongue is properly aligned. If you can, wear the same socks you plan to wear on the trails, along with any insoles you’ll be using.
Step 2: Around town
Once you’ve spent some time breaking in your boots at home, it’s time to move outside. Wear them on easy jaunts around the neighborhood. Walk the dog. Go to the park. Take them to the grocery store or have them on when you’re out running errands. After that, start walking on steeper hills and exploring various city features such as grassy fields, steel bridges, concrete overpasses, urban playgrounds, or metal sports bleachers. Start with short trips and gradually increase the distances.
Step 3: On the trail
Now that you’ve worn your boots around town, it’s time to hit the trails—just don’t start too big. Select some easy day hikes, preferably limited to 1-1/2 to 2 hours or less, to complete the process. Elements like dirt, rocks, roots, and other technical features will continue to stretch and mold your shoes as you walk. Try to pick hikes with elevation gains and, even if you don’t need it, wear a backpack to add some weight.
Tips for Breaking In Hiking Boots
As you begin breaking in your hiking boots, keep the following tips in mind.
Lace your boots properly
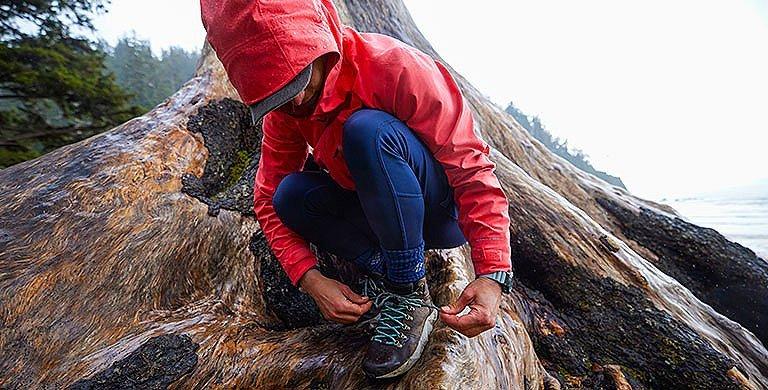
Blister prevention begins at home when you’re putting on your boots. Lace them up snugly and make sure that the tongue is in the center of your foot so it doesn’t rub on the side. Once your laces are tightened, also check that the knot is well secured so it doesn’t come loose and start chafing.
Avoid trying shortcuts
It’s tempting to try to fast-track the process of breaking in your hiking boots. However, it’s best to avoid easy fixes you might see on the internet such as soaking them in warm water, freezing them overnight, or heating them up in the dryer. These strategies usually don’t work and even when they do, they can often damage your shoes or make them wear out faster. Learn how to take care of your outdoor gear and always read the manufacturer’s instructions. And remember —the best trick to break in your hiking boots is time.
Don’t forget to break in your feet
It’s not only your hiking shoes that you need to worry about—your feet need to be broken in too. As you begin wearing your boots more often, pay close attention to the points where they make contact with your feet, especially anywhere you feel them rubbing. These are called “hot spots.” The secret to creating helpful calluses is to wear your boots long enough to feel those hot spots emerging, but take them off before you develop full-blown blisters.
Avoiding Blisters 101
What causes blisters?
Since the whole point of breaking in your hiking boots is to prevent blisters, it’s helpful to understand what causes them in the first place. Circumstances vary, but hiking blisters are generally caused by three main factors: friction, heat, and moisture.
How to prevent blisters:
In addition to breaking in your boots properly, there are a few tricks that can help reduce the chance of getting blisters when you hike.
Since the whole point of breaking in your hiking boots is to prevent blisters, it’s helpful to understand what causes them in the first place. Circumstances vary, but hiking blisters are generally caused by three main factors: friction, heat, and moisture.
- Friction: This is the most obvious one—when your boots rub against your skin, it causes friction, which in turn chafes your feet and leads to blisters.
- Heat: Although not as widely discussed, heat can cause blisters too, especially when your socks rub against your feet and heels.
- Moisture: As you sweat, the moisture makes your skin softer, which causes it to be more susceptible to tearing and breaking. The same can hold true for moisture from rain, fog, and other weather elements.
How to prevent blisters:
In addition to breaking in your boots properly, there are a few tricks that can help reduce the chance of getting blisters when you hike.
- Make sure your boots fit: Blister prevention actually begins in the shopping aisle. If your hiking boots are too big, too small, or they simply don’t fit your feet right, it doesn’t matter how diligent you are about breaking them in. Buying hiking boots that fit properly from the beginning will cause your feet to thank you.
- Find the right socks: Socks can make a big difference too when it comes to warding off blisters. Experiment with a range of styles, lengths, and thicknesses to figure out which ones accommodate your feet the best.
- Dislodge any debris on the trail: When you're hiking, it’s common for tiny pebbles, twigs, bits of pine cones, and other trail items to get stuck in your shoes. Whatever you do, don’t keep going when this happens. Stop immediately to remove the foreign objects before they have the chance to rub your skin and give you blisters.
- Keep your feet healthy: Do simple things like trimming your toenails and stretching your feet to keep them in shape for hiking. And apply cream to calluses—the healthier your skin is, the less prone it will be to blisters from chafing.
Need some hiking boots for your upcoming excursions? Check out Columbia Sportswear’s hiking footwear


